
How to quickly change fonts using the arrow keys
These days everyone has tons of font choices. Some fonts, such as Helvetica, Georgia, Zapf Chancery and the ubiquitous Comic Sans, are so engrained in our minds that we don’t need to see them in action to know what they look like. But sometimes we want to see a headline or body text in lots of different fonts, to see which one looks best. But changing fonts can be a drag.
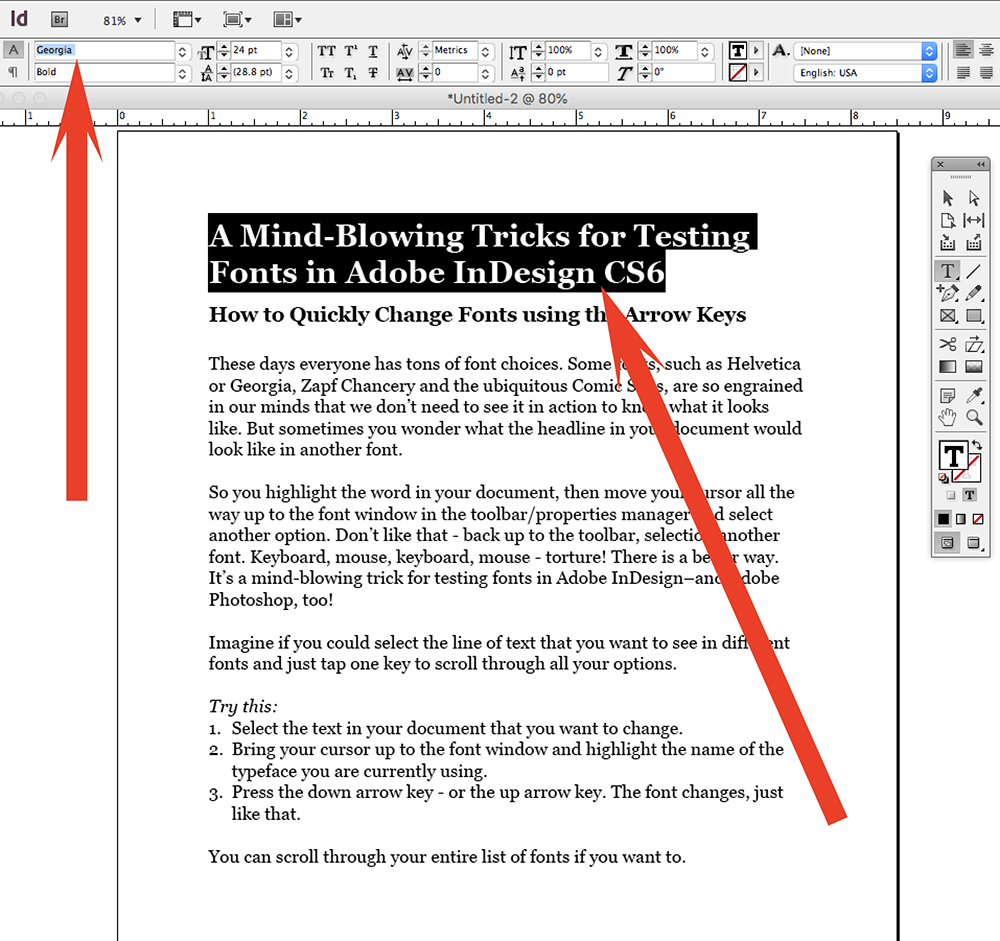
The traditional way to change a font in a document is to highlight the word. Then, move your cursor all the way up to the font window in the toolbar/properties manager and select another option. If you don’t like that font – back up to the toolbar, selection another font. Keyboard, mouse, keyboard, mouse – torture!
What’s the trick?
Truth is, it’s not a trick, really. And it works in Adobe InDesign and Photoshop. Once you get the hang of it, you’ll wonder how you managed all this time without it.
Try this:
- Select the text in your document whose font you want to change.
- Bring your cursor up to the font window and select the name of the very first typeface in your list. (The selected text should now be displayed using that font.)
- Now, keeping your cursor in the font window, press the down arrow key. The font changes, just like that, to the next font in the list.
- Keep pressing, until you find the perfect font.
- Want to go up the list, rather than down? Press the up arrow key.
This technique for changing fonts is so simple, you can scroll through all your fonts, see the text in every possible option, in no time at all. When you can see all the possible options, you’ll know that you made the best choice for your design project.
See all our Adobe InDesign Tips & Tricks articles. And please, let us know if you find them helpful.