It’s easy to create a starburst shape using Adobe InDesign’s polygon tool. Follow our simple instructions below.
1. Let’s get started
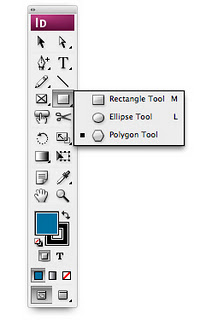
a. Select the polygon tool in your tool bar.
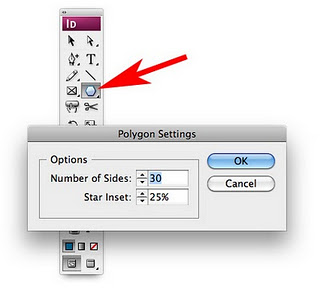
b. Once the polygon tool is selected, double click the polygon tool icon in the toolbar. A dialog box will pop up.
2. Appearance
How you would like the starburst to look? How many points would you like it to have (number of sides) and how deep would you like the points to be (star inset)?
3. Border and fill colors
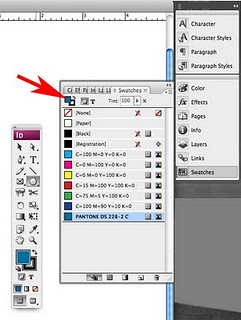
Select your swatches palette. What colors would you like to starburst to have? There are two squares in the upper left hand corner of the swatches palette. One solid (the color you choose for this square will determine the inside color of your starburst), the other hollow (the color you choose here will determine the border color). Toggle between these options by single clicking each square to select.
4. Drawing
Now it’s time to draw your starburst. Place your cursor, click and drag. If you want the burst to be symmetrical, hold down the shift key as you drag.
5. Border Width and Style
Would you like to change the border width or style? Select Stroke from the window menu.


